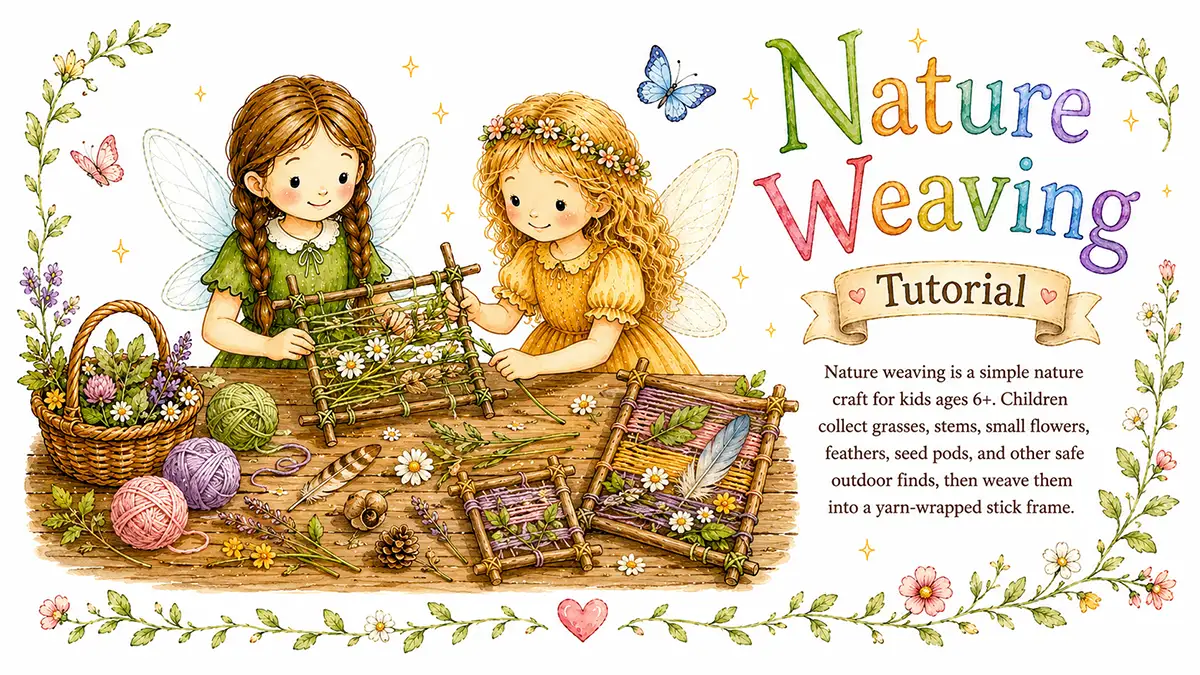
Nature weaving is a simple nature craft for kids ages 6+. Children collect grasses, stems, small flowers, feathers, seed pods, and other safe outdoor finds, then weave them into a yarn-wrapped stick frame.
It works well after a nature walk, during a quiet afternoon, or as a slow summer craft children can keep adding to as they find new pieces outdoors.
Quick Details
Ages: 6+
Active time: 30 minutes
Extra time: None
Materials: Sticks, yarn, grasses, flowers, feathers, seed pods
Mess level: Low
Best for: Quiet afternoons, nature walks, summer crafting, screen-free time
Main skills: Collecting, tying, wrapping, weaving, arranging
Adult help needed: For tying tight knots, trimming yarn, and checking natural materials
Why Kids Like This Craft
Kids enjoy nature weaving because it begins outside. They get to look closely for grasses, stems, feathers, flowers, seed pods, bark strips, and other small textures that feel like the season.
The weaving itself is calm and simple. Children can tuck in one piece at a time, move things around, and keep adding to the frame later if they find something new.
What Kids Will Make
Kids will make a small woven nature frame using sticks, yarn, and collected natural materials.
The simplest version uses two sticks tied into a cross. Older kids can make a triangle or rectangle frame, add more yarn lines, or arrange their finds by color, texture, or season.
Supplies Needed
You’ll need:
- 2 to 4 sturdy sticks
- Yarn, twine, or cotton string
- Scissors
- Natural materials such as grasses, flowers, feathers, seed pods, thin stems, or strips of bark
- Shallow tray or basket for collected pieces
Optional extras:
- A walking bag or small paper sack
- Extra yarn colors
- A small label tag
- Hole punch for a hanging tag
- Ribbon or string for hanging
Best Materials to Use
Choose sticks that are dry, sturdy, and not too crumbly. Sticks about the thickness of a pencil are easy for kids to hold and tie.
Thin grasses, flexible stems, small flowers, feathers, seed pods, and narrow bark strips are easiest to weave. Dry pieces usually hold up better than damp ones.
Yarn is easiest for younger kids because it grips the sticks and gives the natural pieces something soft to tuck into.
Materials to Avoid
Avoid unknown plants, mushrooms, berries, thorny stems, and anything sticky or irritating.
Avoid collecting from roadsides, sprayed lawns, protected plants, or private areas where gathering is not allowed.
Avoid wet flowers or damp leaves if you want the weaving to last more than a day or two.
Before You Start
Take a short nature walk and collect only small loose pieces from safe places.
Set the collected items in a shallow tray so kids can see what they have. This makes the craft easier to start and keeps the table low-mess.
Cut a few lengths of yarn before beginning. For most frames, 2 to 4 feet of yarn is enough to start. You can always add more.
Parent Setup Notes
For ages 3–5:
- Make the stick frame ahead of time.
- Wrap the yarn loosely enough for children to tuck in grasses and flowers.
- Offer only a few safe natural materials in a tray.
For ages 6–8:
- Let kids help choose the frame shape.
- Adults may need to tie the first knots tightly.
- Keep the weaving loose and relaxed.
For ages 9–12:
- Let kids plan a triangle, rectangle, or more detailed frame.
- Offer extra yarn colors.
- They can create patterns, layers, labels, or a seasonal collection.
Step-by-Step Instructions
Step 1: Collect Natural Materials
Go on a short nature walk and look for small, dry, safe pieces.
Good finds include grasses, thin stems, small flowers, feathers, seed pods, dry leaves, and bark strips.
Only collect where it is allowed. Leave living plants alone unless an adult says it is okay to pick a small piece.
Step 2: Choose the Frame Shape
Pick two sticks for a simple cross, three sticks for a triangle, or four sticks for a rectangle.
A cross is easiest. A triangle or rectangle gives more space for weaving.
Step 3: Tie the Sticks Together
Use yarn or twine to tie the sticks where they cross or meet.
Wrap the yarn several times around each join, then tie a tight knot. Adults may need to help with this part so the frame does not wobble too much.
The frame does not need to look even. A slightly crooked frame gives the weaving a handmade woodland look.
Step 4: Wrap the Yarn Warp
Tie one end of the yarn to the frame.
Wrap the yarn back and forth between the outer points of the sticks to make lines across the open space. These yarn lines are called the warp, but kids do not need to remember the word.
Keep the yarn snug, but not so tight that the frame bends.
Step 5: Tuck in Natural Pieces
Slide grasses, stems, feathers, flowers, seed pods, or bark strips over and under the yarn lines.
Some pieces can go straight across. Others can sit at an angle. Tiny flowers can be tucked near the middle or along one edge.
Step 6: Add Layers
Keep adding small pieces until the frame looks full enough.
Children can group similar colors together, make a wild meadow shape, or leave lots of open spaces.
Step 7: Trim and Finish
Trim long yarn ends with scissors.
Add a loop of yarn at the top if kids want to hang the weaving on a hook, branch, doorknob, or wall.
Step 8: Keep Adding Over Time
The weaving can stay unfinished on purpose.
Children can add a grass stem after a walk, a feather found in the yard, or a dried flower from later in the summer.
If Kids Get Stuck
Try one of these prompts:
- “Do you want it to look wild or tidy?”
- “Which piece should go in first?”
- “Can you find something soft, something spiky, and something long?”
- “Do you want to make a summer meadow, a forest frame, or a tiny nature collection?”
- “Should this be full, or should we leave some open spaces?”
Helpful Tips
- Use dry materials if you want the weaving to last.
- Keep the yarn lines fairly close together so small pieces do not fall out.
- Tie the frame tightly before kids begin weaving.
- Use a shallow tray for collected materials.
- Let kids stop before the frame is full. Open space can look lovely.
Make It Easier
Use two sticks tied into a cross and wrap yarn around them ahead of time.
Give children a tray with a few grasses, flowers, and feathers. They can simply tuck pieces into the yarn without worrying about building the frame.
Make It More Detailed
Older kids can make a rectangle frame with four sticks and wrap many yarn lines across it.
They can sort natural materials by color, create stripes, add a small name tag, or make one weaving each month to show how the season changes.
Seasonal Variations
Spring Version
Use tiny flowers, soft green leaves, thin stems, and light-colored yarn.
Summer Version
Use grasses, wildflower petals, feathers, seed pods, and golden yarn or twine.
Autumn Version
Use dry grasses, small leaves, seed heads, bark strips, and warm yarn colors.
Winter Version
Use evergreen sprigs, bare twigs, dried grasses, and wool yarn. Keep the weaving simple and avoid anything damp or sticky.
Gift or Display Ideas
The finished nature weaving can be:
- Hung on a bedroom wall
- Added to a nature table
- Displayed near a window
- Given as a handmade gift
- Saved as a small summer keepsake
Safety Notes
Adults should help with scissors and tight knots.
For nature collecting, avoid unknown plants, mushrooms, berries, thorny stems, roadsides, sprayed lawns, and protected plants. Collect only where it is allowed.
Wash hands after handling outdoor materials, especially before eating.
Clean-Up
This is a low-mess craft. Most cleanup is small plant pieces, yarn scraps, and bits of bark or grass.
Save dry leftover materials in a tray or paper bag for another craft. Toss anything damp, crumbly, sticky, or unknown.
Finished Craft
When finished, kids will have a handmade nature weaving made from sticks, yarn, and pieces they collected outdoors.
It can be displayed right away or added to slowly through the season. The uneven sticks, loose grasses, and child-chosen details are part of what makes it worth keeping.
Get the free Fairy Marketplace Craft Book
14 beautiful one-page craft tutorials, from nature weaving to cardboard box towns. Plus our favorite new craft ideas and free printables a few times a season.
No spam, ever. Unsubscribe any time.
Check your inbox! Your craft book is on the way. (Give it a few minutes, and peek in the spam folder just in case.)