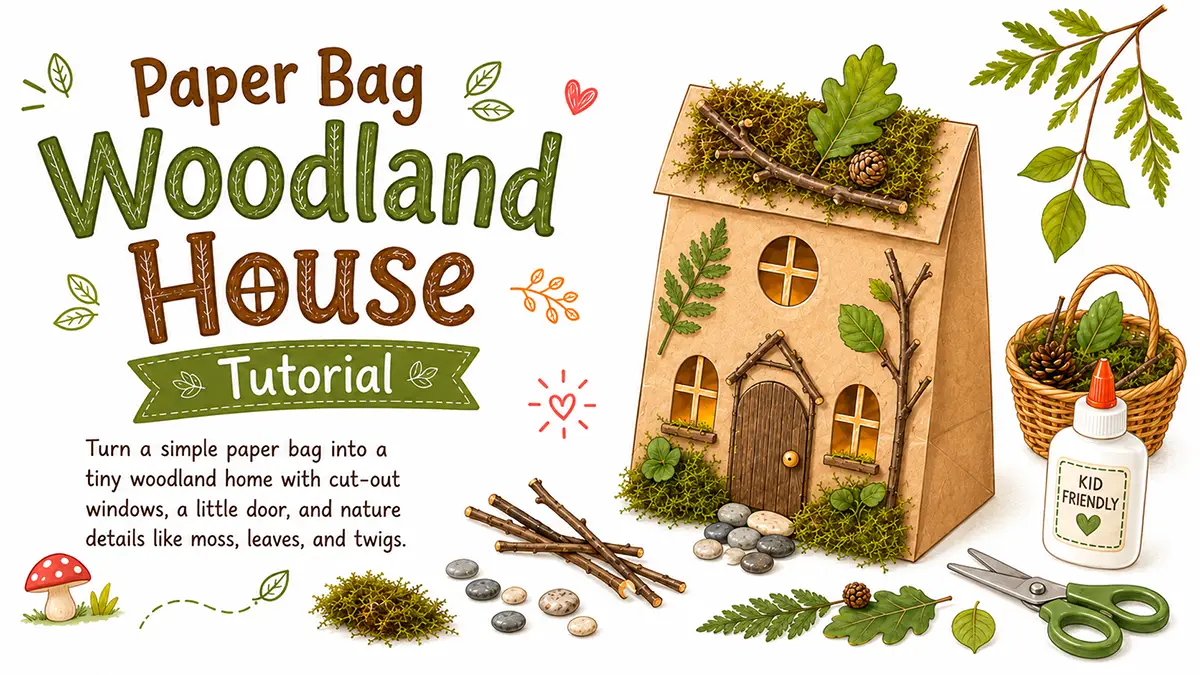
Turn a simple paper bag into a tiny woodland home with cut-out windows, a little door, and nature details like moss, leaves, and twigs. This is a low-mess craft that works well after a nature walk and gives kids a small world to decorate and play with.
Disclosure: Some links on this page are affiliate links. If you buy through them, Fairy Marketplace earns a small commission at no extra cost to you. As an Amazon Associate we earn from qualifying purchases.
Quick Details
Ages: 4+
Time: 30+ minutes
Materials: Paper, foraged natural materials
Mess Level: Low-mess
Best Seasons: Spring, Summer, Autumn
Best For: Nature walks, quiet crafting, imaginative play, seasonal decorations
Why Kids Love It
Kids get to turn something ordinary, a small paper bag, into a tiny house that feels like it belongs under a tree stump or beside a garden path.
It is also fun because they get to use things they collected themselves. A leaf becomes a roof tile. A twig becomes a fence. A bit of moss turns into a tiny front yard. It feels a little like building a home for a storybook creature, without needing a complicated setup.
Supplies Needed
- Small paper bag, kraft bags work especially well
- Leaves
- Twigs
- Moss
- Small flowers, seed pods, bark bits, or acorns
- Scissors
- Glue stick or white craft glue
- Markers, crayons, or colored pencils
- Optional: Cardstock, yarn, stickers, washi tape, or scrap paper
Short on time? These quick supply links can help you gather what you need.
Before You Start
Collect safely: Only gather leaves, twigs, moss, and flowers from places where it is allowed. Avoid plants from roadsides or sprayed lawns.
Keep pieces small: Tiny twigs, little leaves, and small bits of moss are easier to glue and look better on the house.
Dry materials work best: Damp moss or wet leaves can make the paper bag wrinkle. Let collected materials sit on a towel for a little while before crafting.
Help with cutting: For younger kids, an adult should cut the windows and door first.
Step-by-Step Instructions
- Flatten the bag gently
Lay the paper bag flat on the table with the bottom flap facing down. This will become the roof area when the bag stands up. - Draw the house shape
Use a marker or pencil to draw a front door, windows, and any extra details like shutters, stones, vines, or a little path. - Cut the windows and door
Carefully cut out the windows. For the door, cut along three sides so it can open and close like a tiny flap. - Stand the bag up
Open the paper bag so it stands like a small house. Adjust the bottom so it sits flat. - Decorate the roof
Glue leaves onto the top of the bag to make a leafy roof. Overlap them a little, like shingles on a cottage. - Add woodland details
Glue small twigs around the door, moss near the bottom, and tiny leaves or flowers around the windows. Keep the glue light so the bag does not get soggy. - Make a tiny front yard
Use a scrap of cardstock as a base if you want the house to stand more securely. Glue the bag to the base, then add moss, pebbles, twigs, or leaves around it. - Let it dry
Leave the house standing in a safe spot until the glue dries. Once dry, kids can use it for pretend play, a seasonal display, or a tiny woodland village.
Quick Tips
- Use a glue stick for paper details and white craft glue for heavier natural pieces.
- Pre-cut doors and windows for younger kids so they can focus on decorating.
- Make a whole village by giving each child one bag and letting them create different homes.
- Add a battery tea light nearby, not inside the paper bag, for a cozy display.
- Use the leftovers for paths, fences, signs, or little gardens.
Simple Variations
Spring House: Add tiny flowers, green leaves, and a bright paper door.
Summer Fairy Cottage: Use moss, petals, and colorful marker details.
Autumn Woodland Cabin: Use orange leaves, bark pieces, acorns, and twig fences.
Story House: Let kids name who lives there, then make a tiny sign for the front door.
Finished Craft Idea
Place the finished paper bag house on a shelf, windowsill, or nature table. A few houses together make a sweet woodland village, especially with leaves scattered around the base like a little forest floor.